- Color Management Solutions
- Benchtop Spectrophotometers
- Portable Spectrophotometers
- Color Management Software
- Color Quality Control Software: Datacolor Tools
- Cloud Color Quality Control Software: CloudQC
- Pigment Formulation Software: Match Pigment
- Dyer Color Formulation Software: Match Textile
- Dye Production Optimization Software: Process, Ticket and Weigh
- Dye Production Optimization Software: Weigh
- Retail Paint Software: Paint
- Visual Evaluation & Lab Tools
- Color Audit Services: Assessment Services
- Colibri Platform
- Benchtop Spectrophotometers
- Learning Center
- Customer Support
MENUMENU
- Color Management Solutions
-
-
- Color Management Software
- Color Quality Control Software: Datacolor Tools
- Cloud Color Quality Control Software: CloudQC
- Pigment Formulation Software: Match Pigment
- Dyer Color Formulation Software: Match Textile
- Dye Production Optimization Software: Process, Ticket and Weigh
- Dye Production Optimization Software: Weigh
- Retail Paint Software: Paint
-
- Learning Center
-
-
- Hands On Courses, Color Training + Learning Seminars
- Options include classroom style seminars, bring a trainer on-site to your organization, or attend a virtual learning session.
-
- Upcoming Events
-
Find Datacolor on the move at industry trade shows or join us for an upcoming virtual or in-person event.
-
- Customer Stories
- Discover how Datacolor has transformed processes and outcomes for businesses across the globe.
-
- Color Science Essentials
-
Learn the fundamentals of color science and stay up-to-date with how-to articles, webinars, and more.
-
-
- Customer Support
-
-
- FAQ
- Explore the most frequently asked questions about your color devices, software, and services.
-
- Informative User, Quick Start and Installation Guides
- View and download documentation for your Datacolor hardware and software.
-
- Support Services
- Obtain access to a dedicated support team by signing up for a support plan.
-
- Colibri Software
- Supported versions and downloads
-
-
 Datacolor
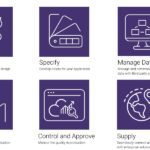 Datacolor
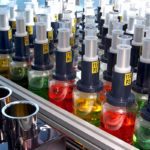 Datacolor
 Datacolor
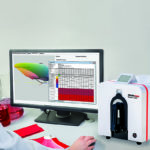 Datacolor
 Datacolor
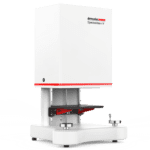 SpectraVision + Tools SV